Showing posts with label Recipes. Show all posts

Wednesday, 8 April 2015

Crockpot Teriyaki Chicken


This past weekend I had a special visitor.  My mom came down for the long weekend.  I needed a babysitter for Saturday so she decided to stay up for a couple nights.  My Ma lives 90 minutes away.  I know it's not that far.  But when your mom is your best friend, anything further than walking distance is hard!  We spent all of Sunday together and we had the most lazy, relaxing day.  Days like this call for Crockpot meals!  I have had this recipe for Teriyaki Chicken kicking around my Pinterest for a few weeks now and I've been dying to try it.  Finally boneless skinless chicken breast went on sale so I picked some up Friday so we could give it a go.

Here's what you need.


I made three changes to the recipe.  First, I didn't have Cider Vinegar on hand.  The recipe calls for 3 tablespoons.  My substitute, 2 tablespoons White Wine Vinegar + 1 tablespoon Apple Juice.  Second, the recipe calls for 1 clove of garlic.  I refuse to follow any recipe that calls for only 1 clove of garlic on the grounds of principle.  I added 2.  Third, I reduced the amount of sugar in the recipe from 1/2 cup to 1/4 cup.  


The recipe was very easy to put together.  All you do is mix the ingredients and pour over the chicken.  Personally I think you might as well mix all your ingredients in the crockpot and then put your chicken on top and stir it around.  Why make more dishes?? According to the recipe you are to cook this on low for 4-5 hours.  I must absolutely express here the importance of getting to know your crockpot! Mine gets really hot!  In fact, the 'keep warm' setting actually boils any liquid in the pot!  My chicken was perfectly cooked after only 3 hours on low! 


Next step is to remove and dice the chicken.  Strain the liquid into a sauce pan and bring to a boil.  Then you have to add a slurry of cornstarch and water (2 teaspoons of each) and let boil until thickened.  This only took me about 30 seconds.


Toss the chicken in the thickened sauce and you're all set!  We served our chicken with rice and broccoli.


This was delicious! The chicken was tender and juicy and the sauce had just the right balance of flavors.  Give this one a try.  It's worth a Pin!
Here's a printable recipe for you!


Wednesday, 1 April 2015

Easy Slow Cooker BBQ Ribs


 I've made these slow cooker ribs before and they were a huge hit with the hubs.  So when ribs went on sale cheap I didn't think twice about making them again!  This time I documented the process for you guys!  I used this recipes method but I use my own spice rub that I'll share with you.  I hope you will like it! 


Here's what you'll need.  Plus barbecue sauce of course.  I hesitated sharing this pic with my little one.  But it was so funny I just had to.  Usually he is in the background somewhere saying "cheese" whenever I'm taking pictures for my posts.  This time he was sitting on the counter and leaned over to get into the "food selfie".  He's always trying to be a part of it all!


Start by making your spice rub.  2 tablespoons brown sugar, 1 tablespoon Cajun seasoning and 2 teaspoons garlic powder.  I try not to get too complicated with my spice rubs.  And using a pre-made mix like Cajun seasoning is a great shortcut.  I don't add salt or pepper here because the Cajun seasoning has enough for my taste.  It's pretty spicy!!  This amount of spice rub was perfect for the 2 pound rack of ribs I had.  If you are making more ribs, make more rub accordingly.


Place your ribs in your slow cooker standing upright, leaning up against the sides of the pot.  Then pour your barbecue sauce on top of the ribs, allowing it to drizzle down the sides. The original recipe calls for 1 cup of barbecue sauce.  I didn't measure.  Just pour until you ribs are completely covered in sauce.  Set the slow cooker on low and cook for 6-8 hours until tender and you can easily pull meat off the bones with a fork.


Carefully remove the ribs from the slow cooker.  I use a flipper and a pair of tongs.  Place them bone side up on a baking rack sprayed with non stick spray.  Put this on a baking sheet lined with foil for easy cleanup.

Strain all that sauce from the slow cooker into a small sauce pan.  Bring to a boil on medium heat.  Cook this for about 15 minutes until it has reduced by about a third and is nice and thick.  While the sauce is boiling set your oven to broil.

Brush the ribs with sauce and broil for about 3 minutes.  DO NOT LEAVE THE KITCHEN!  This will burn really quickly if you're not looking.  Now, this is totally optional but I like to double baste my ribs with barbecue sauce.  The outside is the best part after all!  So take the ribs out from under the broiler, brush with sauce and broil again.  Then flip them and do the same thing on the other side.


These ribs are delicious!!!  If you've been nervous about making ribs at home, this is a really fool proof recipe!  Give it a try!


Monday, 30 March 2015

Deep Dish Pizza


Do you ever have one of those days where you feel like everything takes longer than you expected?  The days where you only get out of the house in the afternoon to do a billion errands?  Traffic is heavy, the stores are busy and you end up at home right at supper time.  This is exactly what happened to me the other day.

Now I'm all for homemade, healthy food options. But do you know how many meals we make in a year?  If you only cooked two meals a day for five days a week (I'm leaving room here for left overs) that's 480 meals you've made in a year.  So sometimes I'm all for adding a jar of this or a can of that.  Sometimes.  This was one of those times. I seen this recipe and I knew this would be great for a busy day.


The first thing I did was throw my bacon in the oven, yep that's right I said oven.  Check out how  here


Then I put my pan on medium heat and squeezed my sausage from the casing and broke it up with my spoon as it cooked, so i would have little pieces of sausage to scatter throughout.


Next find a "deep dish" to cook your pizza in and spray with cooking spray (make sure to spray up the sides a bit too) and place your Pillsbury pizza dough inside pressing up against the sides of dish. Spread your pizza sauce on top with the back of a spoon.  At this point I decided to look at the back the package for the dough and it told me to pre-bake dough for 8 minutes sans sauce.  But when I had read the Pinterest recipe it didn't say to do that.  So I just continued on and disregarded the package instructions, since I didn't really see the point of pre-baking anyways.


Then add the rest of your toppings.  Mine were onions, peppers, pepperoni, cooked sausage, bacon and of course cheese, lots of cheese.

Put in the oven at 400 degrees (bonus oven is already at 400 degrees from bacon)


Bake for about 20 minutes.

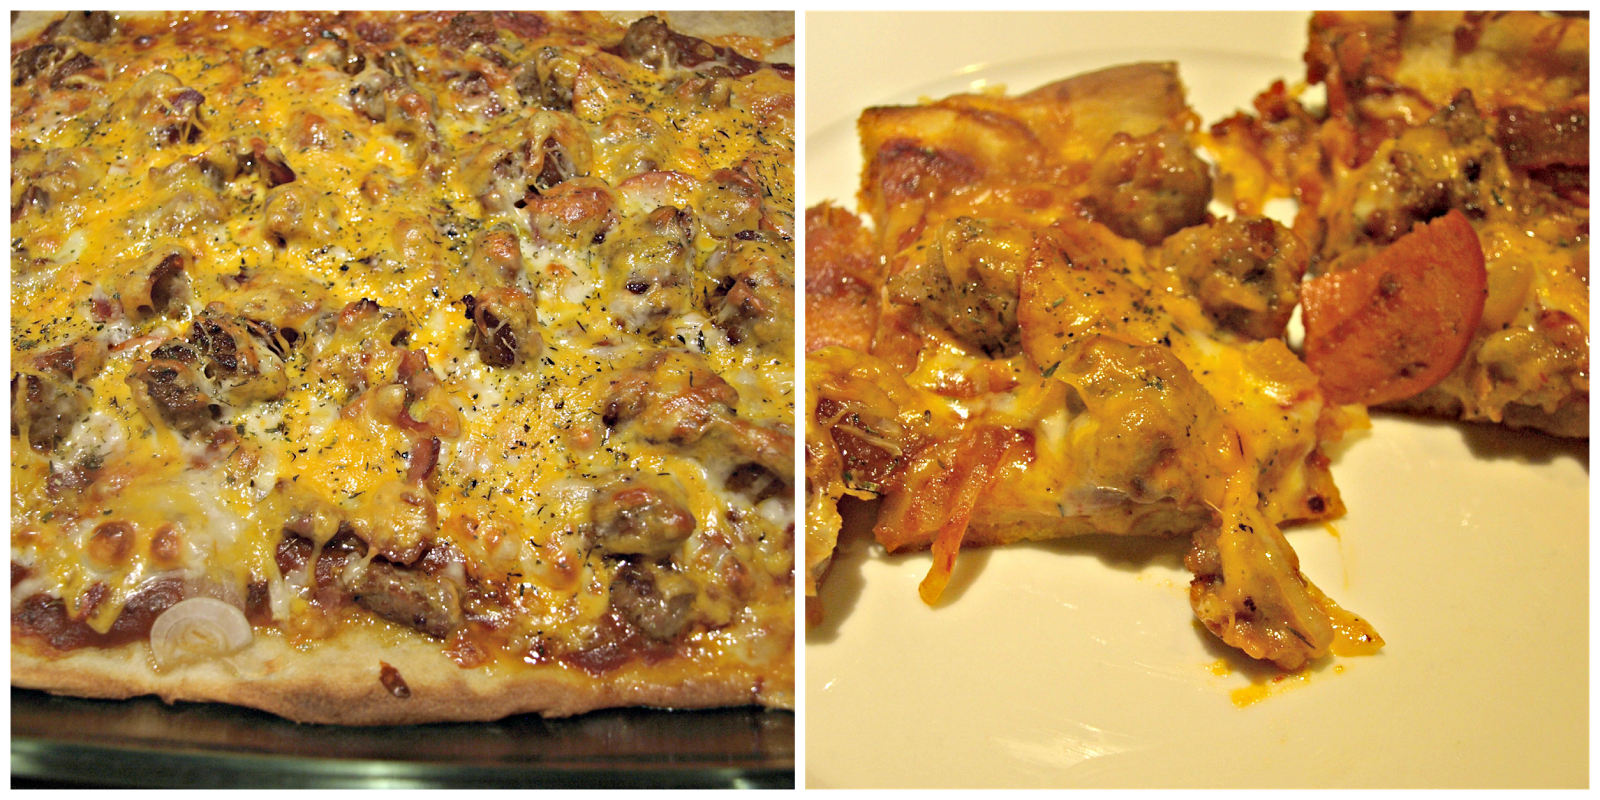
My extra step was to top with a few drizzles of olive oil and Italian seasoning and broil for a few minutes until cheese is a little bubbly and slightly browned.

YUM!


A quick easy deep dish pizza.  This is a great base for leftovers.  Left over chicken, sausage, ground beef, even ham can be used up on this quick pizza. 


Tuesday, 24 March 2015

Taco Tuesday


A few days ago when cleaning out my freezer I discovered some ground beef that had been sitting in there too long.  Usually when this happens it means Taco night!  Taco Tuesday anyone?  I don't actually remember if it was a Tuesday when we had the tacos, I just really love the Lego Movie!  Anyone out there know what I'm talking about?  Anyways, I've been wanting to try this pin I'd seen for baked tacos for a while now.  I had a taco kit, I had ground beef, mission was a GO!  So, technically this Pin was a more complex recipe including homemade taco seasoning.  Please guys don't get me wrong, I'm all for making your own taco seasoning!  But I got the taco kit on sale and, well, I'm a busy girl.  Who are we kidding, I'm ashamed.  Very, very, ashamed.  Now that I've got that off my chest let's continue.  The first thing I do when getting supper ready is get all my ingredients out and prepare as much as I can before I actually start cooking.  This is especially important if the meal comes together quickly.  This recipe only takes about 20-25 minutes from start to finish.


I start by preheating my oven too 400°F per the instructions from the recipe I pinned.  Then I begin to prepare my beef according to the directions from the taco kit.


Now pretty much all you have to do is fill up your tacos with meat and cheese.  


Here's what mine looked like before they went into the oven.  You'll notice that I have half hard and half soft tacos.  I bought the half and half kit, so I thought that it would be a great opportunity to test both for you guys.  


Here's what they looked like after about 8 minutes.  The pin recipe said to cook them for 10 but I kept an eye on them and felt like they looked about right at the 8 minute mark.  Maybe my oven is a bit hotter, who knows.  


Yummy!
You guys have to try this recipe out next time you have a taco night!  You know how everytime you eat tacos they always crack right down the bottom making a massive mess!  Well not anymore!  The shells became just a little softened during cooking, they had great texture!  As for the soft tacos, the sides didn't stand up very well while they cooked as you may see in the picture.  They also stuck to the glass dish.  Cooking spray should help with this problem.  I think I liked them just as much as the hard tacos though!  They were so delicious!  I think I ate four!  And I made a big taco salad the next day for lunch. 

You guys gotta Pin this one!


Monday, 16 March 2015

In A Hurry Cinnamon Buns


You've probably seen this Pin for 8 Minute Cinnamon rolls at one point or another.  I probably shouldn't have made them considering I was in a real munchie mood when I did.  The chances of me eating them all on my own were pretty high. But of course I went ahead and made them anyway.  Here's how it went.


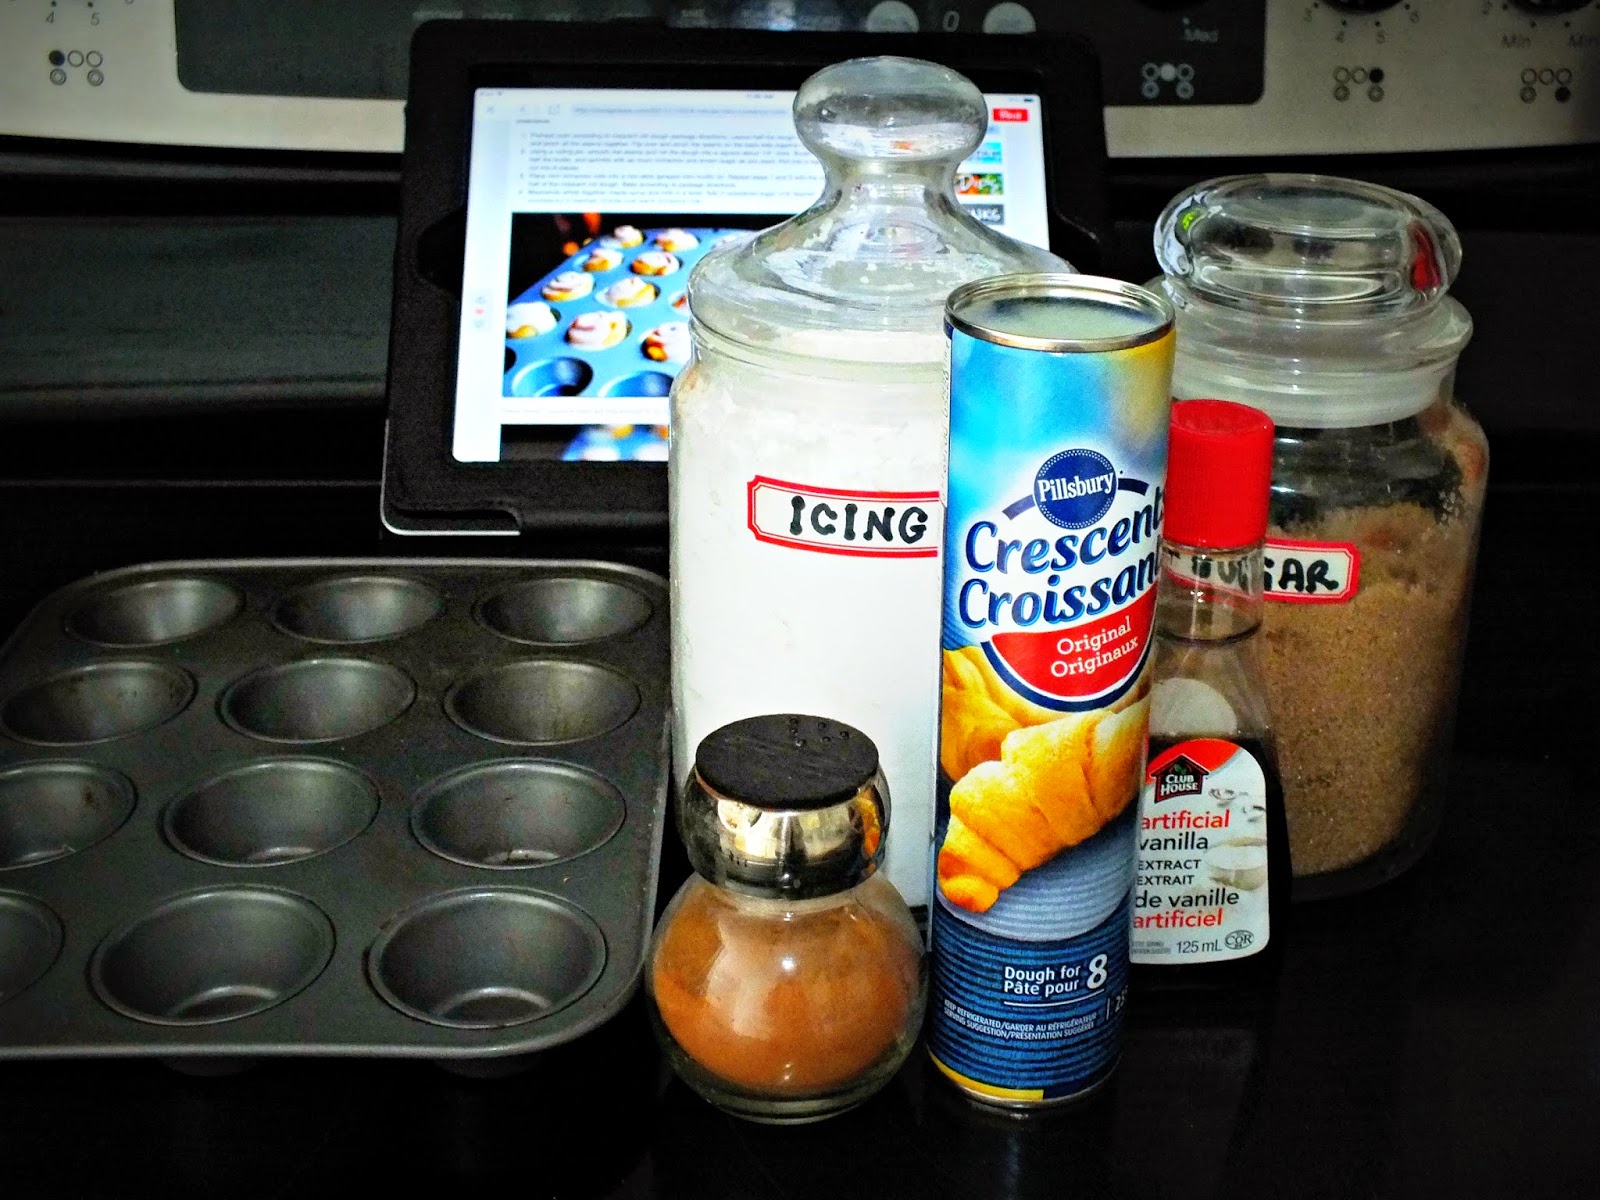
You'll need these ingredients, plus butter for your muffin pan.  


Go ahead and open up your Pilsbury Crescent Rolls.  Try to get the dough out in one piece.  It will make it easier to roll out.  Now the recipe says to do this in 2 batches.  I apparently didn't read this properly (detecting a trend here) and rolled it out in one.  Hey if anything it saved me some time.  I recommend dusting your work surface with a little icing sugar to prevent sticking.  Roll out your dough just slightly, and pinch all the seams tightly.  You don't want those seams coming apart when you go to roll out your buns. 


It's totally up to you but I opted not to brush my dough with butter.  This dough is full of butter anyways and honestly in the end, it was still decadent and delicious.  Sprinkle the dough with as much cinnamon and brown sugar as your heart desires.  Can you tell which side I did, and which side my little guy did?


Roll up your dough.  Now here's where my lack of reading the recipe got me in trouble.  Because she did half the dough at a time, she cut each half into 8 buns. So I was thinking wow these are going to be big!  I went with it anyways, but I cut one of my 8 buns in half to see what the difference in size and cooking would be. So in the end I got 9 cinnamon buns.

A serrated knife works well for cutting the dough.

Butter your muffin tin will so they don't get stuck with all that brown sugar.  Bake for 8-10 minutes at 375°F.


A note on the icing from this recipe.  The recipe calls for 1 teaspoon maple syrup, 3/4 cup of icing sugar and 1 tablespoon milk.  I had to add an extra tablespoon of milk, there was no way the icing would be drizzle-able with only 1 tablespoon.  I also added a bit of vanilla. 


I am never going to admit whether or not I ate them all!

I definitely recommend this recipe.  The crescent rolls are a great short cut.  I plan to keep a can in the fridge to make these the next time I have last minute guests.


Friday, 13 March 2015

5 Minute Chinese Soup


There's a few things I like about winter, the first snowfall (the flakes of snow are usually big and almost flutter to the dry ground; it's really pretty), and the last snowfall (I'm too cold to think it's pretty anymore).  Also I really love soup!  It warms me from the inside out.  So when I seen this Pin for a quick Chinese soup I had to try it.

This soup called for baby bok choy but I had just used mine up, so I threw in a combination of spinach and kale.  It also called for 1 tablespoon of dark soy sauce and 1 tablespoon of light soy sauce, I just had regular soy sauce, so I put two tablespoons of that in.


Basically chop up your bok choy and green onions (or in my case kale and spinach too), start to heat your chicken stock in your pot and throw everything in till your noodles are cooked.  I used  oriental style instant noodles for mine and they cooked within two minutes.


Spoon into bowls and enjoy!


Here's my version of the recipe for you to print.


Monday, 9 March 2015

Warm Artichoke Dip


There are lots of artichoke dip recipes on Pinterest and this one is too, but only because I pinned it.  It's so fast and so good.  I'm pretty sure I've made this so often that every one of my friends has had this appetizer (maybe twice).  There is always someone asking for this recipe once they taste it.  I know you'll love it too.  I usually try to keep these ingredients on hand because it is such a quick and delicious appetizer to whip up last minute.

 All you need is a can of artichoke hearts, a container of cream cheese, Parmesan cheese, a little butter and garlic, a small casserole, and a quick sprinkle of paprika for color (optional).


Let the cream cheese sit on counter a few minutes to soften, this step will make your life a little easier.  Once softened spread whole container with the back of a spoon into your casserole dish.


Open and drain can of artichokes, chop them up into bite sized pieces. Mince a garlic clove (I tend to use one and a half cloves).  Melt two tablespoons of butter in a large measuring cup or microwaveable dish (I do this to cut down on dishes, but you could melt in a smaller dish and add to your artichokes later).

 Add artichokes and garlic to measuring cup and mix it around with the melted butter.

Spread the artichoke mixture evenly on top of your cream cheese.

Sprinkle about 1/4 cup of Parmesan cheese on top.   I don't measure here, so I probably end up with a bit more cheese than that.  I just try and lightly cover the artichokes with cheese.


 Then sprinkle with a bit of paprika (I used smoked but regular will do).  It's really just for a bit of color and totally optional.  When your ready to eat just microwave for 1 minute or until warm all the way through.  It's usually about four minutes for my microwave.  Serve with Triscuit thin crisp crackers or a nice baguette.  I guarantee this will be a hit at your next gathering.


Delicious!


Great on baguette


or on crackers
 

Here's a printable recipe for you.